Asian Dumpling Wrappers
Making the wrapper dough for your own Asian-style dumplings is surprisingly simple. Oh, it is also highly rewarding the first time you bite into one of your homemade dumplings using a wrapper you made. The taste and texture is clearly superior and worth the small amount of effort you invest.
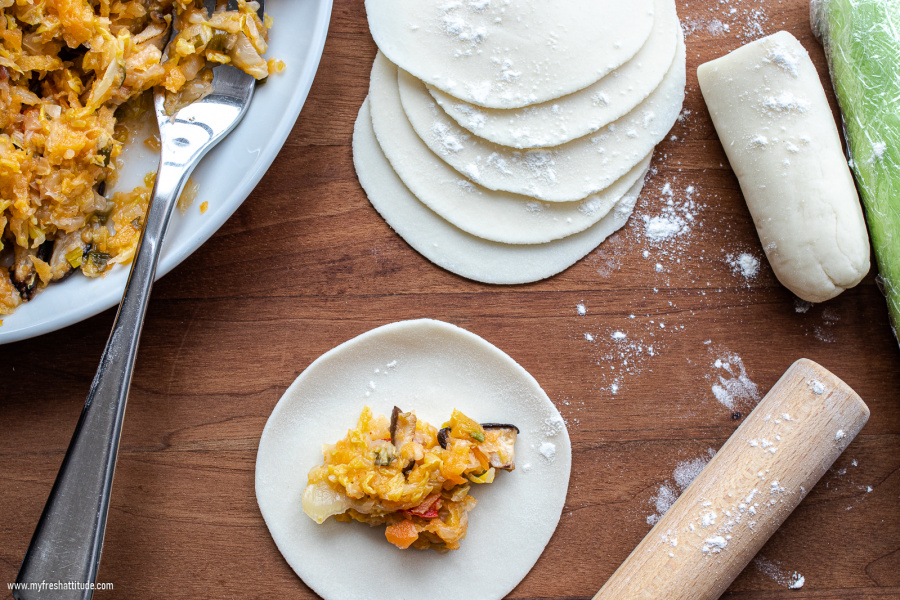
This dough recipe is the foundation to many different types of Asian dumplings: steamed dumplings, pot-stickers or gyoza, won-ton skins and many more. The technique is simple to master and you won’t need any special equipment – just some willing hands and a scale.
Subscription Required For This Content
Making the wrapper dough for your own Asian-style dumplings is surprisingly simple. Oh, it is also highly rewarding the first time you bite into one of your homemade dumplings using a wrapper you made. The taste and texture is clearly superior and worth the small amount of effort you invest.
This dough recipe is the foundation to many different types of Asian dumplings: steamed dumplings, pot-stickers or gyoza, won-ton skins and many more. The technique is simple to master and you won’t need any special equipment – just some willing hands and a scale.
Many recipes use only flour and water. My version combines wheat flour and glutinous rice starch – an ingredient that is easily purchased in most Asian stores ( just make sure it is glutinous and not simple rice starch).
You can use either cold or hot water to formulate the dough. The temperature of the water typically dictates the cooking method you will employ – boiled dumplings generally require thicker skins to withstand the pressures of boiling water, and pan-fried or steamed dumplings require thinner skins. Cold water creates a dough that will have a mostly thick skin – hot water expands the starch and yields thinner and softer skins.
Home-made wrappers naturally taste superior to anything purchased from a store. Of course, you will need a bit more effort to make the dough (only roughly 5-minutes), but they are also easier to work with and cost far less.
Be sure to use a scale for this recipe – the measurements need to be exact!
The base recipe below will yield enough dough to produce about 20 dumplings. It is simple to double the recipe, and you can keep extra dough wrapped tightly in plastic and refrigerated for one day or frozen for about 3 months (defrost one night in the refrigerator).
Base Recipe
108 grams (1 cup) all-purpose flour
42 grams (1/4-cup packed, 1 1/2-ounces) glutinous rice starch
90 ml. (a bit more than 1/3-cup, 3-ounces) just boiled water
- Start by mixing the flour and starch together in a medium-sized bowl. I usually do this by sifting them together, which helps to prevent any clumps from forming.
- Boil your water and add it all at once to the dry mixture. You need to quickly mix the dough to form a homogeneous consistency…and yes, it will be hot. Start by using a wooden spoon or silicon spatula to get the mixture made, then get your hands in there and form the dough into a ball shape. Use your fingertips to work all of the water into the flour and starch. Wear gloves if the dough is too hot, but I find it cools relatively fast and it never gets to the point of creating any burns or blisters.
- The dough should feel soft to the touch but firm enough to hold its shape. Begin to knead the dough on a lightly floured surface for about 2-3 minutes, or until the dough is smooth and elastic (the dough should bounce slowly back and leave a slight impression when poked with your finger). Remember…kneading the dough does not mean forming a pancake. You want to stretch the dough with the heel of your hand, then fold back into a ball. Just keep repeating until the dough softens.
- Cover your warm dough in plastic wrap and place it inside a freezer bag or something similar. Rest the dough for 30 minutes – perfect to get your filling ready or to grab a quick cup of tea.