Sourdough Discard Ideas
Millions of people all over the world are now jumping into the world of baking sourdough bread at home. Ok…maybe not millions, but there are certainly a lot of people getting familiar with this ancient art of baking bread – me included.
I have experimented in the past with making my own sourdough starter. And like many home bakers before me, my starter eventually…well, suffered from gross negligence. But this time it’s different – or at least that’s my plan.
Subscription Required For This Content
Millions of people all over the world are now jumping into the world of baking sourdough bread at home. Ok…maybe not millions, but there are certainly a lot of people getting familiar with this ancient art of baking bread – me included.
I have experimented in the past with making my own sourdough starter. And like many home bakers before me, my starter eventually…well, suffered from gross negligence. But this time it’s different – or at least that’s my plan.
I recently followed a Masterclass in How to Make Sourdough Bread by the renowned Irish baker Patrick Ryan. His method is slightly different than what I’ve used in the past – plus he just makes it all look uncomplicated. Well…at least until you reach day 3, the first day of ‘discarding’ from the starter in order to feed your new sourdough starter. I know it doesn’t amount to much financially, but I hate throwing away anything with food value into the bin. And I knew days 4, 5 and 6 would mean the same thing – with even more to discard. And there are those future days to consider – the days I won’t be baking bread or doing much at all with my sourdough starter. I will still need to feed the starter and that means discarding a portion of the current starter.
With this in mind, I decided to experiment with the discarded portion of the starter rather than throw anything away. I knew it was basically 50% flour and 50% water – with a bit of natural yeast. So, in theory, I could include this starter into other recipes and just discount the amount I was adding from the discarded starter from the ingredient amount I knew worked. Simple…right?
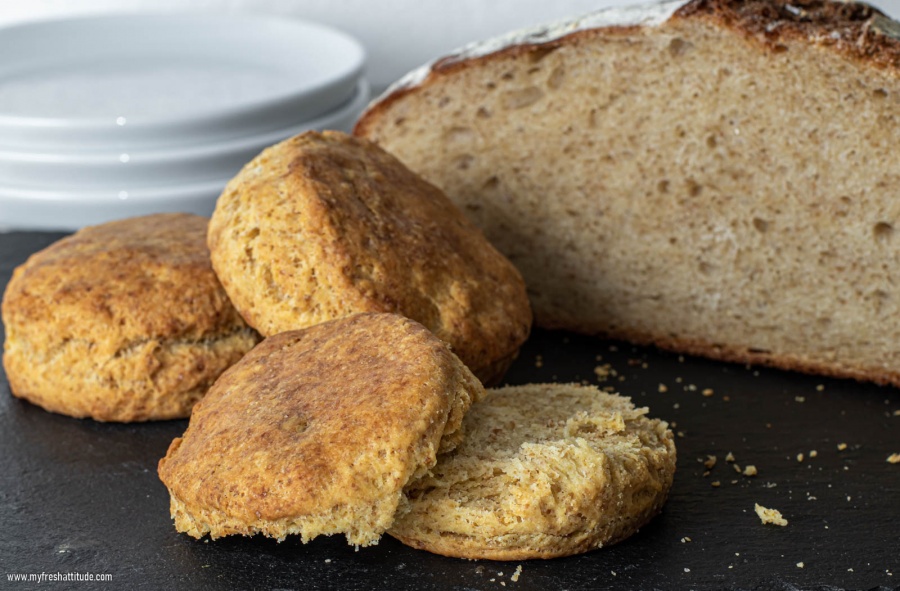
Well, for the most part, the results have been spectacular! The bread is slightly sour and full flavored. The scones were even more incredible. They were flaky and packed full of whole wheat goodness – with a hint of acidity. I created another successful bread on day 3 of my discard following the same procedure as before, only eliminating about half the yeast amount I would have normally added. It’s a bread I would happily purchase from a professional baker.
Now I’m thinking – I don’t have to make a sourdough bread every day just to keep my starter going…and, I don’t need to feel guilty about discarding a portion of the starter when necessary, because I am confident I can use it to create more tasty baked goods.
I will keep adding my tested recipes made from discarded sourdough starter right here as I develop them.
Basic Sourdough Discard Bread
This bread assumes you will be discarding 200 grams (about 7 ounces) of sourdough starter (100 grams water + 100 grams whole wheat flour). I used the method of baking in an enclosed pot for this bread. The crust was amazing and the interior was exactly what I was hoping for – in short, a perfect bread for a home baker.
400 grams (14 ounces) bread flour (see tips)
4 grams (1 teaspoon) dry instant yeast
10 grams sea salt
275 ml. (about 1 1/4 cup) water
200 grams (7 ounces) sourdough discard
Extra virgin olive oil
- Place all the flour into the bowl of a mixer. Add the yeast to one side of the flour and the salt to the other side. Add the water and sourdough discard, then begin mixing with a dough hook – making sure to start on the lowest setting and gradually increasing to medium speed. Knead the dough for about 7-9 minutes until it appears smooth.
- Coat a bowl with a bit of extra virgin olive oil, then add the kneaded dough to the bowl. Work it with your hands and form into a ball. Cover the bowl tightly with plastic wrap and allow the dough to rise in an area that is not too hot – mostly room temperature is fine.
- Allow the dough to ferment until it doubles in size – about 2 hours. You should be able to pull apart a small amount of dough and stretch it out until you can see your fingers through the dough without it tearing.
- Once the dough is proofed, gently remove from the bowl onto a clean work surface. Fold the dough several times like closing a book, then form into a tight ball. Place in a lightly oiled ceramic baking pot (I use a Le Creuset), making sure to put the dough into the pot with the bottom facing up. Lightly flour the dough, then cover, and allow the dough to rise in the pot for 1 hour.
- Preheat your oven to 220°C (425°F).
- After the hour of resting, go ahead and put the entire pot into the oven. Bake for 35 minutes, then remove the lid, and bake an additional 15 minutes without the lid.
- Remove the pot, cool about 10 minutes, run a knife around the edges to make sure the bread isn’t sticking and tip the bread out of the pot and onto a wire rack to cool.
- Cool at least one hour before slicing into the bread!
Sourdough Discard Vegan Scones
This recipe assumes you will be using 150 grams (about 5 1/3 ounces) of sourdough discard (one half whole wheat flour + one half water). Makes about 9-12 scones depending on your cutter.
200 grams (7 ounces) all-purpose flour
2 teaspoons baking powder
½ teaspoon baking soda
¾ teaspoon sea salt
2 tablespoons sugar
90 grams (a bit more than 3 ounces) unrefined rapeseed oil (see tips)
60 ml. (a little less than ½-cup) soy milk
1 teaspoon apple vinegar
150 grams sourdough discard
Vegan egg wash (see tips)
- Preheat the oven to 210°C (about 400°F)
- Begin by gathering all the dry ingredients and sifting them into a large bowl. Sifting is important in order to equally distribute the baking powder and soda and prevent the scones from taking on a soapy taste (this would be yucky).
- Next, add all the oil to the sifted dry ingredients and mix well. Just use your hands for this step and make sure the oil is completely incorporated into the flour mixture.
- Combine the soy milk and vinegar, then add to the flour/oil mixture. Add your sourdough discard at this point and mix everything together. Your mixture should be a bit on the wet side – that’s ok.
- Dust with a bit of flour then place onto a well-floured work surface. Knead briefly…and I mean briefly, otherwise you will develop too much gluten and your scones will be heavy. Roll out the dough until it is about 2 ½-cm (1-inch) thick. Cut out rounds (I used a 5-cm – or 2-inch round cutter) or cut into squares. Place on a baking tray lined with baking paper. Gather up any bits left behind and form into a ball, then flatten and cut out additional rounds or squares. Continue until all the dough is used.
- Brush with your vegan egg wash and place into your preheated oven (you did that step, right?). Bake for 17-20 minutes. Your scones should be a rich golden color. Cool for 20 minutes, then enjoy! Keep leftover scones at room temperature wrapped in a towel. They will keep for a day.